Succulentsgrower.com is a participant in the Amazon Services LLC Associates Program, an affiliate advertising program designed to provide a means for sites to earn advertising fees by advertising and linking to Amazon.com. Amazon and the Amazon logo are trademarks of Amazon.com, Inc. or its affiliates.
Can you use regular potting soil for succulents?
A simple answer to this questions in no. I don’t recommend using a regular or garden soil for succulent plants, unless you adjust it, adding some stuff into it. Regular soil holds too much water and moisture, which will likely result in rotting of the roots of your beloved succulent, and the plant will die before you can propagate it. So, what’s the best solution then?Fast draining soil that holds little moisture is your best bet
What succulents need is a fast-draining soil that holds very little moisture. The soil for these plants must also allow the plants to breathe. Regular soil is too compact and takes time to dry, which is dangerous to succulents, and especially to their roots which are prone to rotting in such a case. As I mentioned though, if you want to use regular soil, make sure that you add some materials to make it fast-draining. You can mix it with mineral grit. The ideal ratio for regular soil to mineral grit is 1:1 or 1:2. This will make the soil more well-draining.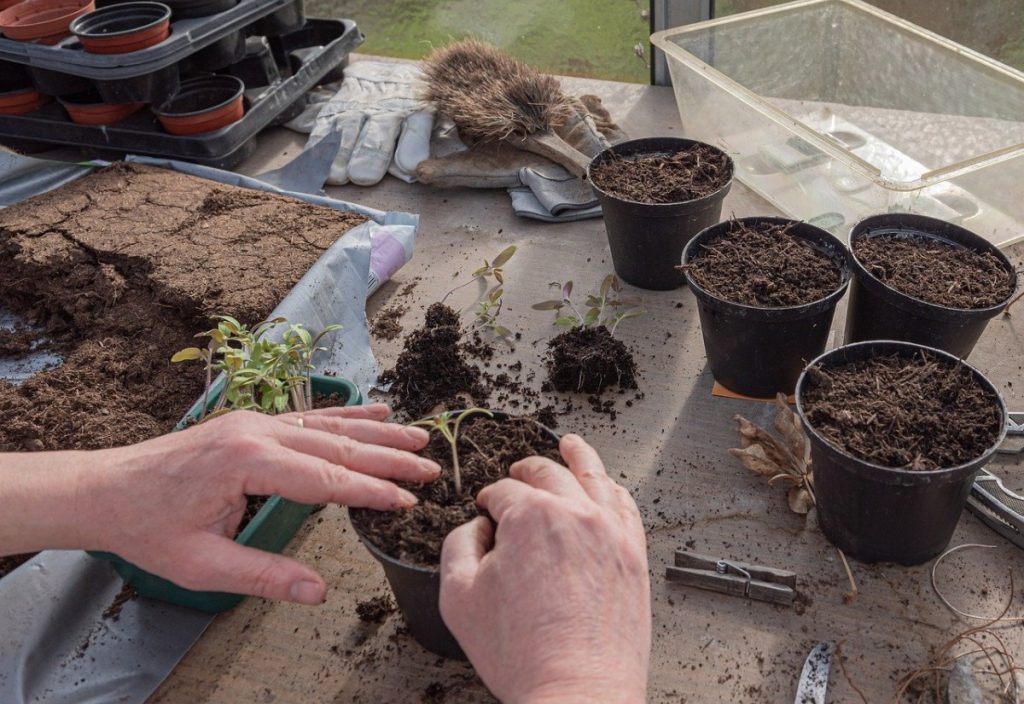
Tips for Beginners when it comes to potting soil for succulents
If you have fast-draining soil, make sure that you use a container or pot with a drainage hole (check my recommended succulent pot on Amazon). Do not plant your succulent in a pot without a drainage hole. The excess water will be stored at the bottom of the pot which will in turn cause roots to rot, and your beloved plant may eventually die. The purpose of the drainage hole is to drain the excess water during the watering. The fast-draining soil will just retain a good amount of moisture needed by the plant and nothing extra. If you are a beginner, making your own succulent soil can be daunting. I get it. I was in that same boat many years ago. Instead of experimenting and finding ways that work, I recommend that you use a commercial succulent soil (just for now, until you gain more experience and can make the right mix at home). The best thing about succulent soils is that you can easily buy it from online stores or local suppliers, simply put it into the pot, and plant your succulent. What’s more, these products are designed specifically for succulents and their needs, so you as a plant owner will have nothing to worry about. There are many succulent soil brands you can choose from. But I personally love a few of them and I will share them with you now.Succulent Planter Soil Kit
The first brand in this list is the Succulent Planter Soil Kit. This product offers everything you need to grow succulents, especially for a terrarium. The kit includes the instructions you can easily follow. With this product, you can just plant your succulent without hassle. The kit comes with clean pea gravel for excellent drainage, activated charcoal to eliminate toxins, organic soil to provide nutrients for the plants, river rock for decoration purposes, and the bright moss to neutralize moisture. Buying this kit does not only provide you with everything you need to grow a succulent plant but also saves you money. It is cheaper as opposed to buying all the needed materials individually Lastly, this kit comes with different sizes such as small, medium, and large. If you are growing succulents in a terrarium, then this product can be your best choice. Check Succulent Planter Soil Kit on Amazon (* this is an affiliate link, if you decide to purchase the soil I may earn a small commission–few cents–at no extra cost to you. )Noot Organic Indoor Plant potting mix
If you are looking for a perfect succulent and cactus soil mix, you may want to try the blend from Noot. This is a pre-mixed that contains materials such as Hard Japanese Akadama, pumice, pine bark, and haydite essential for healthy succulent growth. Check all details on Amazon, the reviews speak for the quality and uniqueness of this product. Just to cite some of my favorite features:- Re-soaked with Noot bio-organic plant food (NPK .10/.15/.12) and ready to use out of the bag. Comes in 1-Gallon resealable bag to store, as needed.
- Quality strains of beneficial bacteria and friendly fungi, that strengthen indoor plants at their cellular level by forming a symbiotic relationship with root systems.
- Better resist root rot, bounce back quicker from neglect, and have increased resistance to temperature swings so indoor plants stay happy.
Bonsai soil mix by Tinyroots
The Bonsai Jack Succulent Soil is one of the fastest draining succulent soil. Using this soil ensures your succulent plants’ safety from root rot or over- watering. It is also one of the cleanest and safest soils you can get from the market today. It is super lightweight. The manufacturer makes sure that the soil is safe from insects and pathogens. What I like the most about this succulent soil is its ability to provide aeration to the plants. The particles of the materials included in the mix are ¼ inch in size making it more breathable for the plants compared to other brands. If you have a large project, this soil is perfect. Check it on Amazon and see yourself what others succulent growers thing!Anothera Succulent Cactus Soil Gritty Mix
For me, this is probably the fastest draining soil mix you can have for your plants. This is perfect for succulents that need a slight amount of acid. The product is created by people with tremendous experience in growing succulents. This is the reason why this soil mix has excellent quality, as you can see with more details on Amazon. The excess water will surely drain through with this soil, regardless of how much water you give your succulents. All the ingredients in this product are designed to protect the plants from any form of pathogens that can harm the plants. This product comes with different sizes you can choose from. All of these are pre-washed making it a safe soil for your succulents and cacti.Final thoughts
I don’t recommend using regular potting soil for succulents unless you make some changes to it, adding materials that change the properties of the soil and make it more suitable for your plants. This is because regular potting soils are too compact for succulents.Do succulents like acidic soil?
Many plants grow well in a soil with specific acidity level. What about succulents? Well, the simple answer to this question is that succulents like slightly acidic soil. In fact, most of them grow well in soil with around pH6. The exact level of desired acidity changes from one succulent family to another, depending mostly on their native area. Keep in mind that though we grow succulents commercially now, they have the same genetics like succulents in the wild, and those are always accustomed to certain habitat. Some succulents grow well on limestone soil as an example–for example the Echeveria family. But most of succulent plants don’t like such a soil. And that’s exactly what you should keep on your mind–after reading this article (an important information to come), try to find some data for a particular succulent family that interests you. Let’s move to the facts and myths.Acidity level in succulent soil is the most important factor
This is actually a myth. Personally, I don’t worry too much about the acidity level of the soil I am using for my succulents. What is important for me is the care that I am giving to my succulent plants. The truth is, for years of growing succulents, I found no accurate pH level perfect for succulent plants. While it is true that plants don’t grow well in extremely acidic soil, succulent soil mix will provide what they need, even if you do not care, or do not know what the exact pH level is. I don’t make my own succulent mix anymore to be honest. I buy all of soil online (check my recommended succulent soil on Amazon), simply because it costs close to nothing and it is more convenient. But if you want, you can also make your own soil as long as you have the required ingredients. Remember that succulents need soil that allows the excess water to drain freely. Good succulent soil allows the plants to breathe. Succulents won’t grow well in compact soil. It holds too much water and moisture, and succulents do not like to stay in such wet conditions. Keep this on your mind when making your soil mix.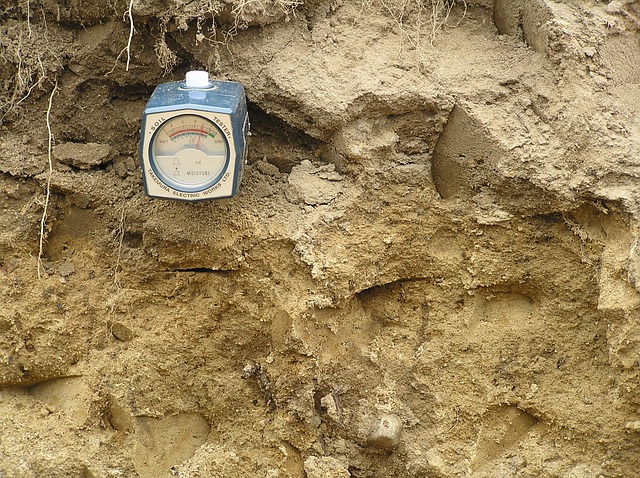
You cannot grow succulents successfully in your own soil mix
This is another myth. People grew succulents with great success long before we knew Amazon and one could buy special soil for succulents commercially. I also tried making my own soil before, and the only problem I had was time. I am working on a regular job, and when you count to it other obligations, I just do not have time to make my own soil mixes. Anyway, the beauty of making your own succulent soil mix is that you can decide and adjust all the ingredients. Sometimes you feel that the commercial soil mixes are not coarse enough. Making your own will allow you to make what is best for your plants. Just make sure it has all the ingredients I will share below–they also make for a correct acidity level. Related Article: Can I Use Orchid Potting Mix for Succulents?Three key ingredients for a succulent soil
1. Potting soil
One of the ingredients is the potting soil as a base. Any all-purpose soil will do. Just make sure that it is clean and fresh. You can buy it from the nearby garden store or order it online. When buying potting soil, make sure that it is light and porous. Remember that succulents need a fast-draining soil. A porous soil base will help achieve the perfect soil for your plants. Never use a compact soil or any garden soil. Soil like this will absorb and hold too much water and moisture which will in turn cause root rot in your plants.2. Coarse Sand
Another important ingredient is coarse sand. This will help make the soil mix breathable. But you shouldn’t use the sand from the beach, though it is obviously tempting to do so, especially if you live on the coast. It does not provide aeration. Another problem with beach sand is that it contains minerals that are harmful to the succulent plants.3. Perlite or pumice
Perlite is a lightweight white organic material that looks like Styrofoam. It makes for an excellent addition to the soil mix, making it more porous. Another reason why perlite is a great addition to the mix is that it does not absorb and hold too much water and moisture. It will prevent compaction of the soil, making it fast-draining–and that’s exactly what succulents love. You can buy these materials in your nearby garden store. Or on Amazon: perlite on Amazon, pumice on Amazon. You just mix the ingredients in the following quantity, for a perfect soil mix for succulents:- Three parts of potting soil
- Two parts of coarse sand
- One part of perlite
Final thoughts
Succulents need special soil. A fast-draining soil is one of the requirements. But the acidity level of the soil also matters. Succulents grow well in slightly acidic soil. Think about pH6 and similar levels. Keep on your mind though that right soil is not one-for-all solution. Different succulent varieties prefer different soils, and you should do some more research before planting your succulents.Orchid potting mix for succulents – a good idea?
I still remember the early days, when I was just starting to grow succulents. I had many questions on my mind, and the right soil was one of the mysteries to me. At that time, I bought an orchid potting soil, for my orchard. But I heard that I could use it for my succulent plant too. Just later, after some successes, and some failures with my succulents, I understood the truth. And the answer is: It depends on the types of succulents. Let me explain it a bit more. Orchid potting soil works only with tropical plants. Tropical succulents love more moisture. So adding orchid bark or soil mix to the usual succulent soil mix may have a great results, and your succulents will thrive. But that’s not the case with majority of succulents, which prefer another type of soil.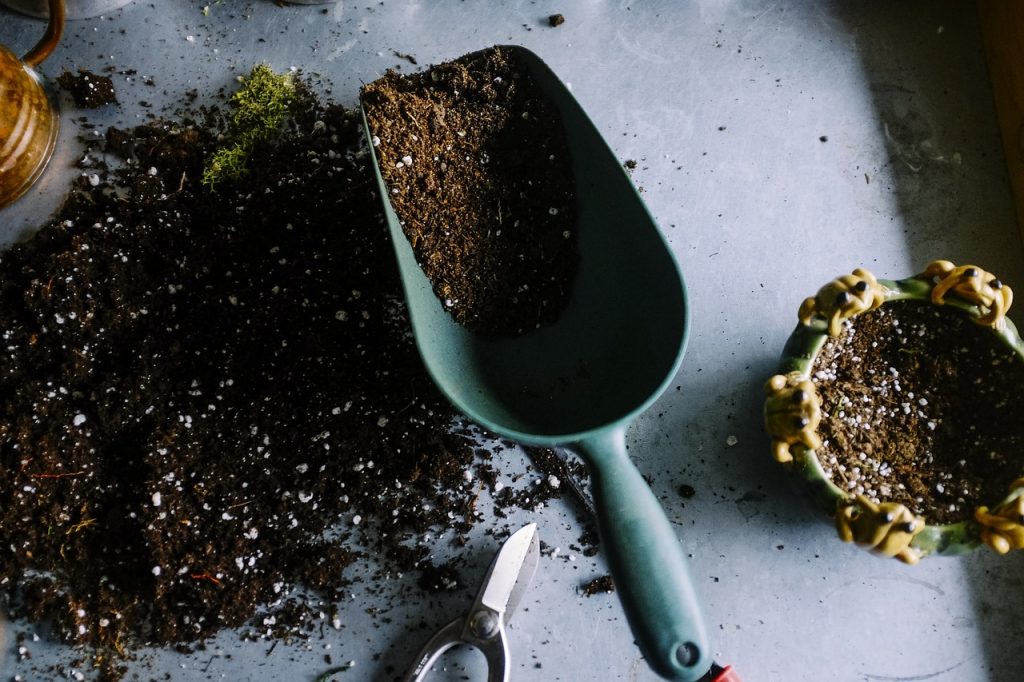
Final thoughts
Orchid potting soil mix is good especially tropical succulents, whereas with other variants you are taking a risk of causing your plants more harm than good.Succulents and sand: Can you grow succulents only in sand, without any regular soil?
Because succulents are commonly found in deserts or sandy areas, many have asked whether or not succulents can survive without soil, just in sand. And my quick answer to the question in yes. Definitely. However, succulents thrive longer in potting soil. The ideal potting mix should contain a mixture of 1/3 sand and 2/3 potting soil. The reason why the combination of sand and potting soil works well for succulents is that soil provides moisture and nutrients, while the sand allows the water to drain faster leaving the roots healthy, free of rot, which is a common problem succulent growers experience. Mixing your succulent soil with sand is a superb idea. However, the versatility of succulents depends on the variety you are planting. Some succulents can thrive in dense sand, and now I will show you some examples. These succulents are not only versatile but also beautiful. They produce colorful flowers. Let’s move to the three categories.Ground cover succulents
As the name suggests, this type of succulents tends to spread over the ground as it grows. It literally covers the ground with beautiful leaves. One of the Ground Cover succulents is the Rose Moss (Portulaca Grandiflora). It blooms from spring to fall. This type of succulent does not grow tall. Usually, it grows for about 6 inches tall and produces light green leaves color with flowers comparable to rose. Another ground cover succulent is the Ice Plant (Delosperma Cooperi). Like the Rose Moss, this succulent also blooms from spring to fall. It grows 3-6 inches tall with green leaves. Unlike the Rose Moss, this succulent produces reddish-purple daisy-like flowers. However, these two types of succulents can grow and thrive in sandy soil. If you are living nearby sea, and you are wondering what succulent to start with, the Ground Cover Succulents can the best choice.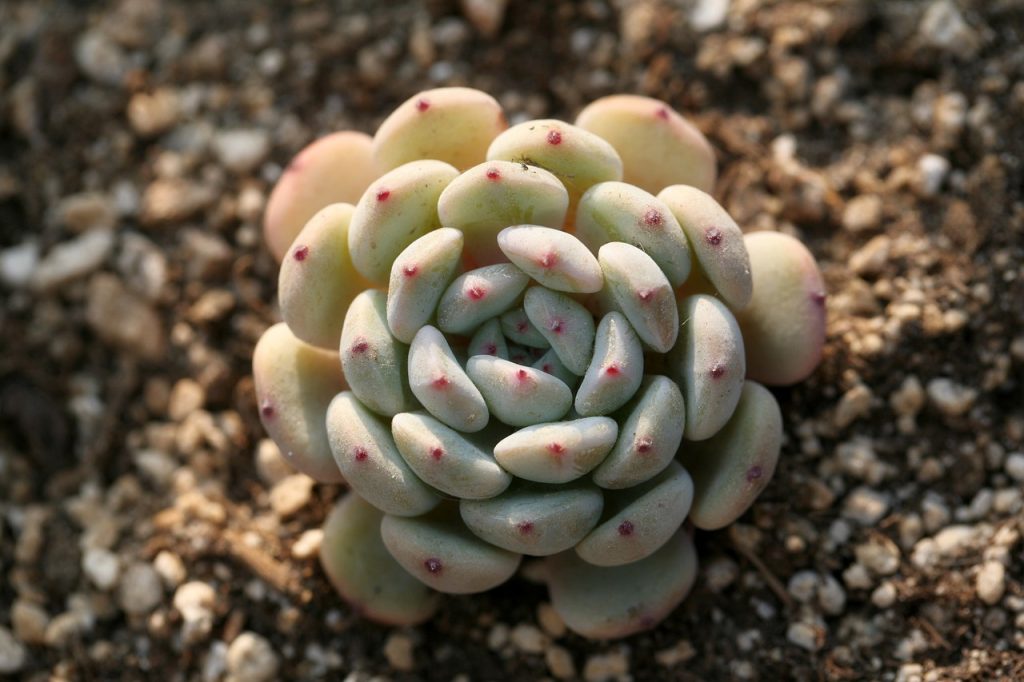
Border succulents
If you want succulents that are not only capable of surviving in the sand but also capable of thriving in drought or hot environment, then maybe you want to consider the Showy Sedum and Myrtle Euphorbia. Showy Sedum also is known as Hylotelephium Spectabile or Showy Stonecrop is one of the most resistant succulents when it comes to high temperature and drought. This plant grows a little bit bigger than the previous types. It normally grows up to 2 feet high and wide. The flower can grow up to 6 inches wide. Another good succulent for this category is the Donkey Tail also known as the Myrtle Euphorbia or Euphorbia Myrsinites. This one is bigger than the Showy Sedum which height can reach up to 6-12 inches. This succulent blooms in the spring and produces yellow flowers. Both succulent types are versatile and could perfectly thrive under the full sun. They love dense sand that allows water to drain easily, just as it does in their native land.Succulent shrubs
Other types of succulents that can perfectly grow in the sand are the Crown of Thorns (Euphorbia Milii) and Inkberry (Scaevola Plumieri) commonly known as beach berry, fan flower, half-flower, and gullfeed. These succulent shrubs can grow in dense sand. As the name suggests, the Crown of Thorns are thorny succulents and have light green foliage. These succulents can have different flower colors such as pink, red, yellow, white, and orange. They can grow under full sunlight or in shade. These types of succulents, however, may not grow in salty soil. The Inkberry succulents, on the other hand, have dark green fleshy foliage. These succulents can grow up to 3 feet in height. They bloom from spring to winter and produce blackberries. Unlike the Crown of Thorns, Inkberry Bushes can grow in salty soil. They are perfect plants nearby seashore.Some taller succulents can also thrive in sand
The succulents mentioned above are only a few varieties that can grow in sand. There are other types of succulents that can thrive in sandy soil. But the reason why we did not include here is that those types are the taller succulents. Most our readers love succulents that stay small. Those succulents that we did not include in this post are capable of thriving in sandy soil but they grow up to several feet high–which isn’t ideal for my garden. Of course, this is our personal preference. If you are looking for succulents that grow tall and thrive in sand, check other resources online. If you live near the seashore, you need succulents that can tolerate salty wind and soil. The three types of succulents mentioned above are your best bet in this case…Can you use sand for outdoor succulents?
You have to remember that sand does not contain nutrients necessary for your succulents. Soil does. However, pure soil is not a perfect potting material either. This is because the soil holds too much water for the liking of a succulent. Having said that, the sand is only an important component of a perfect potting material, not the only ingredient. Perfect potting mix is a combination of sand and soil. The sand provides better drainage while the soil provides nutrients. If you are looking for a perfect potting mix, you can consider the one that we recommend–recommended soil mix from Amazon.Final thoughts
Remember that not all types of succulents can thrive and grow in sand. If you go with one of the varieties we mentioned here, however, you can definitely achieve excellent results with your plants growing in dense sand.Vermiculite as a growing medium for succulents–truth, or myth?
Vermiculite is a mineral which is used in exfoliated form in seed germination, plant propagation from cuttings, and as a part of soil-less growth medium for plants. Most succulent growers wonder whether they can replace pumice or perlite in their succulent soil mix with vermiculite. Hence we will focus mostly on this topic. We will compare all three minerals, and at the end you should know whether or not using vermiculite is a good idea. But we will also border other topics (such as using vermiculite in succulent propagation), just to make sure we have all angles covered. If something is unclear to you at the end of this article, you can always contact us for more information.Vermiculite holds water longer than pumice or perlite
One of the basic rules with succulents is that you do not want the soil mix to hold too much moisture. Such conditions cause root rot, and show me at least one succulent grower who has never lost a single succulent as a result of root rot :). Vermiculite holds water longer than the other common materials you’d use in your own soil mix for succulents, which can cause a problem, especially if it forms a significant portion of the soil mix, or if you grow in such a soil mix one of the succulents especially prone to root rot or other related problems. Having said that, in certain situations this can actually be a benefit, for example when you try to grow succulents from cutting. In this case, you want some moisture in the soil, because when the new roots are forming, they need more water than a mature succulent does. Hence it makes a lot of sense using Vermiculite in such occasions.Vermiculite will prolong the usability of the soil mix
In permaculture (I am still learning about it and how it applies to succulents), you will rarely if ever change the soil in the pot of your plants. In traditional gardening, however, you will change the soil once every year or two, and with succulents maybe once in every three of four years (since they are less demanding than other plants). This is done because the different materials you use in the soil slowly degrade, changing in structure and properties, especially the peat, and the soil will often become too compact for succulents as a result. Adding Vermiculite to the soil mix no doubt extends the usability of the soil mix, which is a big plus from both ecological and economical point of view. Good soil is sparse after all, and it isn’t cheap either. The less often you have to change it, the better for both our planet and your wallet :). Having said that, adding perlite or pumice will produce the same results, so this alone isn’t a reason for substituting them with Vermiculite.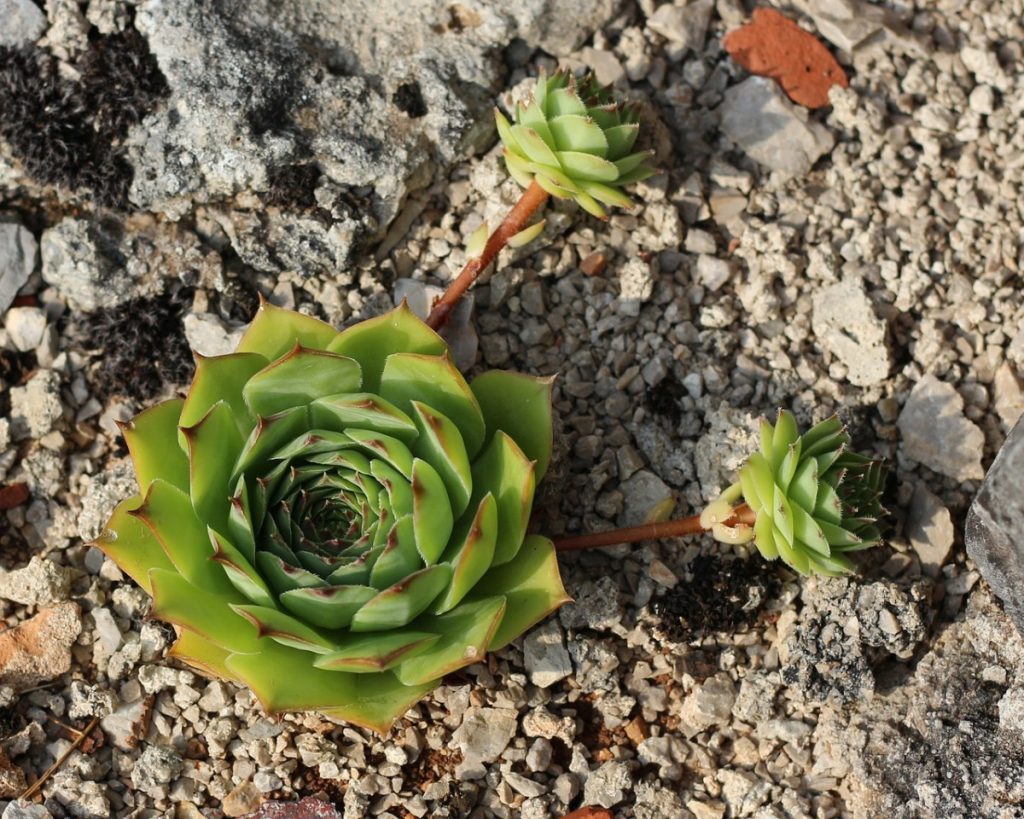
Can you plant succulents in straight Vermiculite?
A quick answer is NO. Succulents aren’t demanding plants, but they still need some nutrients, and won’t be able to get them from inorganic matter only, such as Vermiculite. You may sometimes see succulents planted in straight Vermiculite, but this only for decoration purposes and short term arrangements (such as on fairs or expositions). Succulents can survive in Vermiculite only for a few months, but they won’t thrive, and will eventually die. Having said that, you have a workaround here. If you fertilize the plants with a diluted liquid fertilizer once a week, the succulents will survive in Vermiculite even for longer time periods. But I would not suggest this option, since it isn’t really ecological. It is much better planting the succulents in some good soil mix, and letting them grow without a need to fertilize them regularly.Vermiculite is succulent propagation
Experienced growers can buy one healthy succulents and grow hundreds of other succulents from it, in a matter of a single year. We can propagate succulents from leaves, stems, seeds. And then we can sell them making a bank :). Having said that, the process isn’t always smooth and straightforward, and you may sometime have to use rooting hormones, and sometimes you will need some luck. You can help your luck wit Vermiculite though, since in this case, its properties and the fact that it holds water longer than pumice or perlite actually helps in the process of root formation of baby succulents. I have grown some of my baby succulents in soil mix with decent portion of Vermiculite, and the results have been encouraging to say the least.Final thoughts
As with any other inorganic or organic material for succulents growing, black and white answers do not exist. You can no doubt use Vermiculite in your soil mix, in moderate quantity. It is quite cheaper than pumice, which is also an important consideration, especially if you are on budget, or grow many succulents (and need lot of soil). I hope this article helped you understand some nuances of using this mineral in your succulent growing. If you have any other questions, you can always contact us. Thank you!Spanish moss and succulent plants
Human creativity knows no limits. We always think about new ways of growing our succulents, or at least of decorating the pots, or the overall plant arrangement in the garden. Spanish moss, which many people wrongly mistake with Sphagnum moss (0ften call peat moss), is actually an epiphytic flowering plant that often grows upon large trees in tropical and subtropical climates. It has nothing to do with peat moss from bogs and fells. But can you use it with succulents? And if you can, in which way? First of all, it is important to realize that Spanish Moss does not kill the plant it lives on. It is not a parasitic plant. It just uses a tree–or a succulent, or any other plant, as a place to hang on. But it absorbs nutrients and water through its own leaves from the air and rain (or water we use to water the plants) falling upon it. It doesn’t take any nutrients from the soil where your succulent is planted. This means that succulents and Spanish moss can coexist “peacefully” in a plant arrangement, small garden, or even in a single pot!Spanish moss absorbs a lot of sun which can limit the growth of your succulents
Succulents love sun, and most of them love to get lots of it. I think this isn’t surprising to many people, considering that the plants are native to semi-desert and desert areas, where sun shines a lot and people pray for rain :). You should consider this when thinking about adding Spanish moss to your succulent garden, or simply implementing it in a pot with a bigger succulent. What often happens is that the Spanish moss absorbs most of the sunshine, and the succulent later lacks it. It won’t kill it (lack of sunshine rarely kills a succulent), but it may change color of leaves, won’t grow as well as it normally would, and it may never flower in such a setting. To sum it up, it will survive, but it won’t thrive. Having said that, in certain occasions Spanish moss can actually help your succulents thrive. Let me explain. With low light succulents planted in a sunny spot, for example outside or on a southern oriented terrace, it makes a lot of sense to provide them some shade. Some gardeners may get a shade cloth, others may move the plants around during the day, ensuring they won’t get burned on the strong afternoon sun. The most creative ones though will add Spanish moss to the arrangement, providing a nice and natural shade for the succulents.
Spanish moss traps water, which isn’t necessarily good for succulents
Some gardeners may consider using Spanish moss as a decoration for their succulent pots, placing it on the top of the soil. And while this isn’t a bad idea design-wise, it isn’t necessarily a great idea considering what succulents like, and what can kill them. Spanish moss traps a lot of water in its thin “hair-like” structure. It can stay wet for a long time, especially if placed on the ground instead of hanging from the branches as it normally does in its natural habitat. The last thing succulents like is a wet stem, or a soil that’s constantly wet. This will sooner or later result in stem rot or root rot, which is the no. 1 reason of premature succulents death. Having said that, each of us lives in different conditions and climate. Growing certain types of succulents in very dry climates, it may help having a “layer of Spanish moss” on the ground, to help with at least slightly favorable humidity for both people and succulents. If you decide to go for it, I suggest you to experiment on slow scale first, with just a few succulents. If they are fine after a month and you do not observe any negative changes, you can place Spanish moss to other pots.Spanish moss as a natural fertilizer for succulents
Let me repeat that Spanish moss is not the same thing as Sphagnum moss, often also called peat moss. Peat moss (as you can read in this article on our website) isn’t a good fertilizer for succulents, or a good part of soil mix, since it retains too much water, and causes root rot in plants that do not like wet soil. Succulents are prime example of such plants. Spanish moss is a bit different, but, as far as my knowledge goes, you won’t really reap any benefits using it as a fertilizer, or adding it to the soil mix. It is a plant on its own and deserves a decent life. It doesn’t have a high nutrient content or anything similar, and hence it isn’t a good fertilizer for any plants, in whatever form, live or dead. Last but not least, in my experience, vast majority of succulents does not really need any fertilization, hence such experiments would be just a waste of money.Final thoughts
I hope my writing hasn’t discouraged you completely from giving Spanish moss a try in your garden :). No doubt it can make any plant or flower arrangement more beautiful, but you should also realize that correct placement is the key here. If you mix it badly with your succulents, and it retains too much moisture close to the stem of the plant, or absorbs all the sun (and none is left for the succulents), you won’t be happy with the results. Spanish moss will thrive, but your succulents will suffer…Paver sand and succulents
Paver sand, often called also polymeric sand, seemed like a perfect candidate for one of my experiments with succulents. It is similar in size to coarse sand (0.5-2mm in diameter, according to the sellers), and you can always find some remaining on a construction site, or simply in the room with supplies. Hence I tried two different things. First, I planted one of my hen and chicks succulents in paver sand only, and second, when preparing my potting soil mix for succulents, I replaced coarse sand with paver sand. Then I planted one Jade plant and two other succulents in the mix and wondered what will happen. My hypothesis was that I can just interchange the sands at random, considering they were similar in size, and that my succulents–the undemanding plants, will be just fine. As it turned out though, I was wrong.Hen and chicks died after couple of month in paver sand and root rot was to blame
The experiment with hen and chick plant helped me understand why actually they use paver sand in construction works. Once you add water to it (in a pot, or in a paver installation), it activates bonding agents (additives) in the sand, and the particles basically glue to one another. What seemed like a decent growing medium for succulents before, with sufficient aeration, changes to waterlogged soil, which is a sure recipe for root rot and eventual dying of your succulent. And that’s exactly what happened with the hen and chick plant. It looked just fine at the start, and though I knew that there were no nutrients in paver sand, and hence I fertilized the soil mildly with liquid fertilizer for succulents, it didn’t help to save the plant, simply because it could not breath and started to rot in the waterlogged growing medium.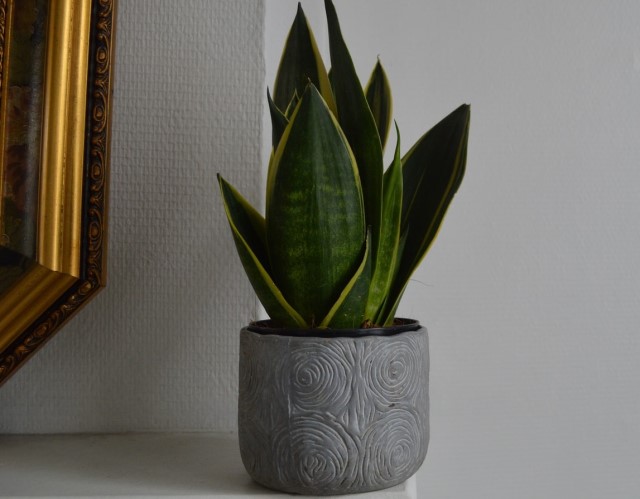
Jade plant, snake plant and other succulent survived in a soil mix with paver sand
The sandy soil I normally use in my succulent mix has particles bigger than 2mm in diameter, which I find ideal for succulents. But I tried to replace it with paver sand. Considering that if formed just 15% of my overall soil mix, all three succulents survived in paver sand, and the soil was drying decently well, considering everything. Of course, I used a pots with a drainage hole, and watered the plants only sparingly, as you should always do with succulents, which no doubt contributed to my success. Still, I feel that paver sand is actually a bit too fine for succulents. You can always sift it, using a sieve that lets through all particles smaller than 2mm or 1.5mm. Not sure it is worth the effort though, especially considering that you may not end up with much usable material after you sift the sand–perhaps just 20 or 30 percent of the original quantity. Of course this depends on the exact paver sand you have.Final verdict on using paver sand in succulent soil mix
Based on the results of my experiments, as well as properties of paver sand, I would not recommend using it with your succulents. It has a few clear disadvantages when compared to coarse sand or other sand you may normally use with your succulents (including those that actually prefer to grow in sand, and grow in it in their natural habitat):- It is very fine, and when watered it even binds together, which is the last thing you want a sand to do with your succulents.
- It is a chemical after all (the additives, the water-activated bonding agents), and you should always try to limit the use of chemicals in your home.
Peat moss and succulents–do they make for a good pairing?
Peat Moss has entered the discussion lately, for couple of reasons. The first one is its general reputation in gardening, and the second one that is actually forms a part of some of the most popular succulent potting mixes you can buy on Amazon, and on websites of other well-known retail stores. But is Peat Moss actually good for succulents? And if it is, in what proportion should we mix it into our succulent soil? We will try to find the answers on the following lines. Before diving into details, let me just give you a quick verdict: Peat moss is not a good growing medium for succulents, since it retains too much moisture. Too much moisture in the soil leads to root rot and premature death of your succulents. That’s likely the last thing you want to experience… As always though, things aren’t black and white only, and we should look at the issue more in depth to truly understand all the nuances of the problem.Peat Moss comes from bogs and fens, that means places that are always wet
In order to understand whether or not to use peat moss for succulents, we have to learn a bit more about the substance. So what exactly is a sphagnum moss? Peat moss is dead fibrous material which forms in peat bogs and fens when moss and other organic material decomposes. I hope you’ve never wandered through bogs and fens, but maybe you saw them from some distance. One thing I am sure about though: You will not find a single succulent living in bogs and fens, since the environment (wet, humid, dark) is a complete opposite of what succulents need. This alone should be a good indication whether or not you should plant your succulents in peat moss. Peat moss is high in nutrients, and retains moisture, which works great with plants that love to bathe in water, or for gardening purposes in drier areas. That’s where you should apply it (if you can afford buying it since it is expensive), but planting succulents in peat moss is a sure way of seeing them succumbing to root rot soon.
Why some popular potting mixes for succulents include peat moss?
To be honest, why many producers of succulent soil include peat moss in their products remains a mystery to me. Maybe they do it because peat (or sphagnum) moss is a buzzword, and most people associate it with good yield. Seeing it on the label of the product may help with sales. You should also remember though that these producers try to make their soil mixes appropriate for a variety of plants, or at least a couple of plant families. Peat moss may not help succulents, but including a bit of it in the mix may be beneficial for other plants the soil mix is branded for. It is also important to check the quantity of peat moss in the soil mix. Some soil mixes branded as succulent soil mixes include as much as 50% of peat moss, which is really too much and you are asking for troubles should you buy it for your zebra plant, snake plant, jade plant or other popular succulent. But some will include only 10% of peat moss, and 90% of other materials, primary inorganic. That’s a completely different math, and such a quantity of peat moss should not be detrimental to your succulents.Think about natural habitat of succulents when deciding whether or not you should use peat moss
When making any decisions with your succulents, it always helps imagining them in their native land. Vast majority of succulents come from semi-desert and desert areas of Africa, Latin America and Arabic Peninsula. Try to think whether you can find a bogs or fens in such regions. You cannot, and hence peat moss is also not present. Why would you want to give your succulents something that’s completely unnatural for them? Think about it for a while. Having said that, we know more than 10,000 different succulent species. While vast majority of them (including all succulents people commonly grow in their houses and gardens in Europe and North America) comes from dry arid areas, there are some exceptions to the rule. For this reason it always makes sense trying to learn something about each particular succulent you buy. Maybe you got a rare succulent that actually likes a bit of moisture, and sphagnum moss (in certain limited quantity) may work well with it. This is really more an exception than the rule though.Final verdict on Peat Moss for succulents
Considering everything, I see no reason why you should even consider using peat moss for your succulents. Succulents like fast draining soil that provides good aeration to the roots of the plant. Peat moss does the exact opposite. The reason why many producers of soil mixes for plants use it (in various quantities) in the mixes they brand as suitable for succulent remains a mystery to me. At the end of the day tough, we should not forget that big companies care mostly for their profits, and make decisions accordingly…LECA balls and succulents
There’s been a lot of hype around LECA balls lately. These small balls of clay, four times more expensive than average soil, have made headlines on many gardening portals. But is there actually any evidence that LECA balls present a good growing medium for succulents? And what advantages does it exactly have when compared to a quality succulent soil mix? I will try to answer the question on the following lines. Before we dive into details, let me make something clear: You definitely can grow succulents in LECA balls. The biggest advantage is that roots are less prone to root rot–the no. 1 reason why people lose their succulents. The biggest drawbacks are the price (when you have two succulents you probably don’t mind paying four times as much for growing medium, but when you have two hundred plants the Math changes suddenly), and the fact that you will have to use pots without drainage holes–something which I do not generally recommend with succulents, but LECA will work only in such pots (remember that it absorbs water slowly, hence if it drains away quickly through the bottom of the pot it won’t absorb any water, and the entire concept will fall apart).LECA is pests free, but does it matter for succulents?
Advocates of LECA claim that since it is free from any living organisms (it is clay after all), you do not have to be afraid of dealing with pest infestation. But is this really just an advantage? We should not forget that plants and microorganisms have lived in symbiosis for millions of years. Many organisms living in the soil are actually beneficial for the plants, including succulents. Having a growing medium with no life has some advantages, but it has some disadvantages too. What’s more, common succulents, such as jade plant, snake plant, zebra plant, hens and chicks, etc, aren’t prone to pests. Powdery mildew is the only exception, though it isn’t that common either. If you grow some rare and expensive succulent, however, for example one of the Korean succulents, that is more prone to pests and more fragile in general, it perhaps makes sense having a growing medium that’s naturally free from pests, such as LECA balls.LECA releases just the right amount of water for your succulents
It is no secret that over-watering and the subsequent root rot (and the subsequent death of your plant) is the no. 1 issue succulent growers face with their plants. Of course, if you do everything right (good pot with drainage hole, right soil mix for succulents, watering the plants only when the soil is dry), you won’t face this problem. We should face the reality though. Most of us are busy, with this or that commitment. We’d love to give our succulents the care and attention they deserve, but sometimes it just isn’t possible. LECA definitely makes it easier, at least when we talk about avoiding over-watering. The way the clay balls absorb water (and grow in diameter), and then slowly release it to the roots of the plant, it is close to impossible to over-water the succulent and experience root rot. This is definitely a point for LECA balls, and you may seriously consider them, especially if you have drown many of your succulents in the past. Having said that, if you have the right setup in place, that means good soil, good pots, and good watering schedule, I do not see a reason why you should change things up just because some new growing medium is trending.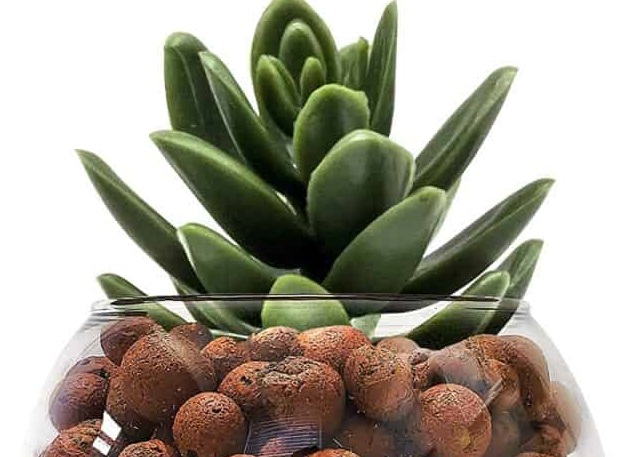
LECA contains no nutrients which means you have to fertilize your succulents
One of the thing I love the most about succulents is that, when grown in a good soil, you barely need to fertilize them. They aren’t demanding, they thrive in neglect. Water, sun, and nutrients naturally present in the soil mix for succulents are pretty much enough to see your plants thrive and shine. But there are no nutrients in LECA, just like there aren’t any living organisms in it. And while succulents do not need much, they still need some nutrients. Hence you will have to fertilize them regularly with hydroponics or liquid fertilizer specific to your plants. Not only does this add to your costs–you have to buy something you didn’t need before. It also adds another layer of complexity to your plant care. Without LECA you had to be careful about the watering schedule–one worry less with LECA. But now you have to worry about not forgetting to fertilize your plants, so basically one worry replaced another :). Also if you grow different succulents coming from different parts of the world, you may have to buy several fertilizers, making sure they are fitting for the plants. That’s another extra worry.Final verdict on LECA balls and succulents
Considering all pluses and minuses, I do not think LECA balls will put a dent to the universe of succulent growing. Sure enough they have some pluses, and it is always tempting trying something new. In certain cases, such as when you struggle with root rot in your succulents, or with pests, it probably makes sense trying them out. On the other hand, if you’ve been doing good with your succulents planted in soil up to this point, I see no reason why you should switch to LECA balls, spending considerably more money, and changing a lot of things in your setup. It just doesn’t make any sense. I will finalize this article with bullet points pluses and minuses of LECA balls for succulents:- + Reduces the chances of over-watering and root rot.
- + Significantly reduces the chances of pest infestation.
- + Looks great in almost any pot.
- + Can be used for any succulent.
- – No life in LECA, you grow your plants in a “dead growing medium”.
- – Lacks any nutrients, hence you need to fertilize the succulents regularly.
- – Very expensive when compared to standard growing medium.
- – You need to change pots when transitioning to LECA, since it needs a pot without drainage.
Epsom salt and succulents
Obviously we all want to achieve great results with our succulents. We want to see them shine, flower, and thrive in our houses and gardens. In order to achieve such results with any plants, people look for shortcuts, experimenting with both natural and chemical substances. One of the most discussed lately is Epsom Salt, one of many naturally occurring mineral salts, a compound of magnesium and sulfate. The theory behind this is that succulents live in rocky and sandy areas, many of which are rich in these minerals, and hence fertilizing them with Epsom Salt can help them grow to size and beauty as they’d achieve in their natural habitat. But is this true, or just a myth? I experimented with Epsom Salt on succulents, and I’ve also talked to other growers who did that. What’s more, I’ve dived into some research in the library, trying to find evidence that would support my hypotheses. One can say that I devoted a considerable time to this topic, trying to find the truth. On the following lines I will explain what I found, and I hope it will help you decide whether or not to use Epsom Salt as a fertilizer for your succulents. Let’s go!Native habitats of many succulent species are rich in minerals contained in Epsom Salt, but that doesn’t necessarily means succulents utilize them
The fact that Bedouins live in Sahara desert doesn’t mean that they live from sand, or eat it… And the same is true about succulents. Many species thrive in rocky areas, but this has little to do with high content of magnesium in such environment. They live in rocky areas because they like the aeration, and the sun and heat on rocks. They aren’t there for Magnesium or any other mineral, and won’t necessarily utilize it just because it is present there. Of course, exception proves the rule here. We should not forget that there are more than 10,000 known succulent species in the world, and probably thousands of unknown species. Some of them, especially those with special shapes or shiny colors of flowers may, in some seasons, utilize Magnesium or even Sulfate they find in the soil. Most succulents just won’t do that though. They live in a soil rich in certain nutrients for a completely different reasons…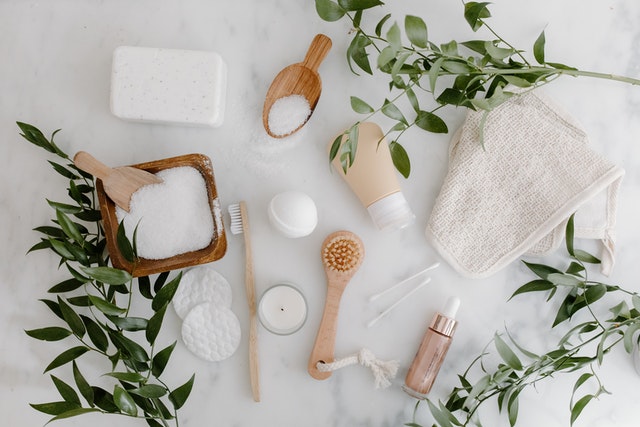
Succulents planted in right soil mix watered with rainwater and getting enough sunlight do not need any fertilizers to flower and thrive
We should not forget that succulents are undemanding plants. Once you do things right at the beginning, meaning planting them in right soil mix (special for succulents), using a pot with a drainage, putting them on a sunny spot, and perhaps watering them with rain water instead of tap water which is full of chemicals in many countries, they will thrive almost in neglect. It is a myth that succulents need fertilizers to flower. Sure, some people need to fertilize them to see them blossom, but that’s because they do not grow them properly at first place (lack of sun, too much water, bad soil mix, etc). This applies to Epsom Salt as well as any other fertilizer. Succulents do not get such an extra boost of nutrients in their natural habitat, so why would you give it to them at your home? Don’t forget that it can cause stress to the plant, which can result in unnatural changes of color and other undesirable results. Keep it on your mind before you buy a kilo of Epsom Salt. Maybe you will benefit more from putting it to your own bath than “bathing” your succulents with it.Small-scale experiments are always welcome, especially if you struggle to achieve desired results with your succulents
With everything I said up to this point, we should not forget that plants are just plants (and I am saying this with a lot of respect to this amazing kingdom of living organisms that feed us). When you lose a plant you can always buy a new one. You can even propagate a new plant from an already dying plant, from a leaf or a stem cutting, with a help of some rooting hormones. Considering this, little experiments are perhaps worth the try, should you struggle to achieve good results with your succulents. If you decide to use Epsom Salts, make sure to start with moderate quantity. You can for example choose three succulents, ideally the same specie, such as three Jade Plants or three Snake Plants. Dissolve Epsom Salt in water (2 tablespoons in one gallon), and spray it on the foliage of the plant, which should result in better absorption than watering your succulents with it, though you can try it as well. Observe the results and compare it with the control group. Make sure that except of the Epsom Salt bath, the plants in a test and control group get the very same care–the amount of sunlight per day, watering schedule, etc. And then wait, and see if the application of Epsom Salts makes any difference for the succulents in question.Conclusion on Epsom salts and succulents
Based on my experiments, reading in libraries, and discussions with fellow succulent growers, I do not think it makes much sense using Epsom Salts as a fertilizer for succulents. It isn’t really necessary, and the theory behind the hypothesis is simply false (while succulents often live in soil/medium rich in minerals contained in Epsom Salts, they do not necessarily utilize any of these minerals). Growing succulents is simple, but you should not look for shortcuts. Try to give your plants what they need, in terms of right soil mix, enough sun, and occasional soaking in water. If you do that and do not grow some rare and demanding succulent, you will get the desired results, without using Epsom Salts or any other fertilizers. I hope it helps and wish you good luck with your succulents!Eggshells – are they good for your succulents?
A quick answer is yes. Eggshells are good for succulent plants, as long as you wash them thoroughly to make them clean and free from pathogens that may get there is the first place. You can also soak them in hot water to make them safer. I have seen many succulent growers using eggshells and they don’t have any problem. If you are new to using eggshells, you may also want to know how to plant succulents in eggshells. This technique is a bit controversial and not well-known, but since I’ve done it myself I will now show you how you can do it to!How to plant succulents in eggshells?
Planting succulents in eggshells is easy. You just need to remember the following simple steps. Before anything else, you need a half-dozen carton of eggs, a small succulent (small enough to fit well into six eggshells) and a potting soil. You also need some tools such as butter knife, small spoon and spray bottle. Before we look at the exact steps, I want to point out one thing: if possible, try to get shells from eggs from chickens (or other birds) that were grown organically. Remember that eggs from supermarkets come from chickens that eat a lot of chemicals and are grown with the help of certain additives and antibiotics. Just as they aren’t good for you, they aren’t good for your plants. It is much better asking your neighbor who has a few chicks on his garden for some eggs, or buy these in a shop with bio/organic goods…. Let’s move to the steps: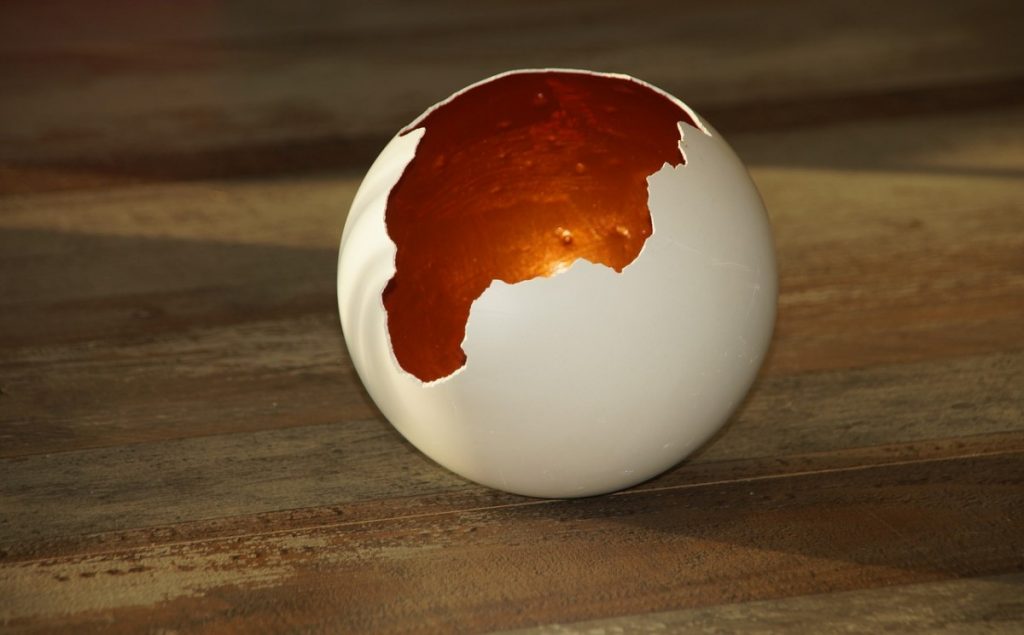
1. Open the eggshell
First, you need to open the eggshell using the butter knife and carefully tap the pointy top of the eggshell, until you create a small hole or small crack. Using your finger, remove the crack side in the shell and have a hole that is big enough to separate the whites and yolk from the shell. Remember that you need to take everything away before you can plant the succulent.2. Wash the eggshells with water
This is obvious perhaps, but you need to clean the shells. Softly rinse the eggshells using a soap and warm water and let it dry in the carton under the sun. Make sure that you do it gently though, and the end of the day an egg can break easily, so if you are not careful enough you may see your shells breaking into pieces and you’ll have to start all over again.3. Fill the eggshells with potting soil
The third thing you need to do is to fill the shells with potting soil once it has dried. You can use your fingers or a small spoon to fill it with potting soil for about ¾ of the shell. Never fill it completely, you need to leave some space of the plant and also for some maneuvering. Remember to use the right soil for succulents, the fast draining soil (check my favorite soil mix on Amazon).4. Plant and water the succulent
The fourth thing to do is to place the succulents to the shell. Remove the succulent plants from their original containers with care. Then gently plant them on top of the soil. Again, keep on your mind the eggshells are fragile. You need to do this cautiously, in order to not break your new container in the very last step! After transferring the succulent plants into the shells, you need to give them water immediately. But just a little bit, since succulents do not like too much water. Also, make sure that the newly transferred succulents have access to light. Do not place them under direct sunlight because they can get sunburned or die.Maintaining succulent plants in eggshells, few actionable tips
- Give them enough sunlight. First, you need to make sure that your succulent plants will get just enough light. Succulent plants need light for about six hours of sunlight per day, but small succulents freshly planted in eggshells won’t sustain scorching sun.
- Rotate the succulent plants occasionally. Rotate the plants occasionally because these plants really love the direct sunlight. It is important especially if only half of the plant is exposed to light, such as when you place your succulents near a window.
- Water your plants according to the season. Succulent plants need more water when they are actively growing. In summer they need more water than in colder seasons. What I use for my succulents is the soak and dry watering method. Said simply, it means that you need to water succulents as soon as the soil gets dry. When you water, make sure to soak the soil not the plant. Then water again only when the soil dries.
- Keep the succulent plant clean. If your succulent plants are placed indoors in eggshells, they will gradually pick up some dust. You need to clean their leaves and spines with a damp cloth. You can also use a small paintbrush to get rid of some dust that it is hard to reach with a cloth.
- Choose the right soil for your succulents. Succulents aneed fast-draining soil to keep them safe from over-watering. You can make your own fast-draining soil for your succulents. In my case though, I buy my soil from online stores.
- Keep your succulents safe from bugs. You can use organic pesticides to get rid of the pests. The solution is 1 spoonful of dish-washing soap, vinegar, and water. Put it in a small bottle that you can spray your succulent plants with.
Final thoughts
Eggshells are good for succulents. Many succulent growers use eggshells and they have a good result, regardless of whether they simply add it to the soil mix (as an interesting source of nutrients), or they experiment with planting small succulents in eggshells. Just make sure that you follow the advice from this post, and anytime possible, use eggs from organic farming (or from the chicks your neighbor has on their garden). At the end of the day this isn’t better only for your plants. It is better also for the planet…Can you plant succulents in straight perlite?
To start with, you should remember that perlite is one of the best ingredients of a perfect succulent soil mix. It helps keep the soil breathable and fast-draining. But can you plant succulents in perlite only, omitting any other ingredients? The simple answer is YES. Succulents can be planted in straight perlite, and they will survive. As always though, things are not as simple as they initially sound.Succulents can survive in perlite. Most of them won’t thrive in it though
Perlite does not have enough nutrients that most succulents need. Mixing perlite with soil is a great option. You can use 80/20 or 50/50 perlite and soil ratio. Some succulents do survive in straight perlite. This is because succulents don’t need many nutrients to survive. But they won’t reach their full potential when it comes to colors and freshness, simply because they will lack something. The second problem I see with pure perlite is that it does not provide strength for the roots and the whole plant. As the succulents grow bigger, they need something to anchor their roots on. Bigger succulents may have weak root foundation if planted in straight perlite. What will happen than is that they will bend, start falling over, and experience other issues you certainly do not want to see. That’s why I always start with the soil mix, especially when propagating leaf cuttings. And I have achieved great results with dozens of succulents of different varieties in my garden and house.Climate and water needs always come to play
Of course, many factors influence what your succulents need, including the soil. Climate, water, growing state, available sunlight, and the immediate surroundings directly affect the growth of these plants. For years of growing succulents, I learned that there is no one rule as how to grow these plants with success. They open doors for experiments. As a grower, you should not be afraid of experimenting a bit. Maybe growing two succulents of the same variety, one in straight perlite and one in a soil mix, would be an interesting experiment. Than after some time you will compare how they do, and how they look, and what problems each one of the plants experiences (ideally none :)). Having said that, incorporating different materials in succulent soil will rarely backfire. You can always incorporate other materials such as turface, poultry grit, pumice, etc. But if these materials are not available in your place, you can choose perlite instead. Perlite is common and easy to find anywhere–that’s why it is so popular. But I don’t recommend planting bigger succulents in straight perlite especially. It is too light to hold the bigger succulents in proper position, to support their roots. In the long run, succulents may suffer some issues of nutrients and stability.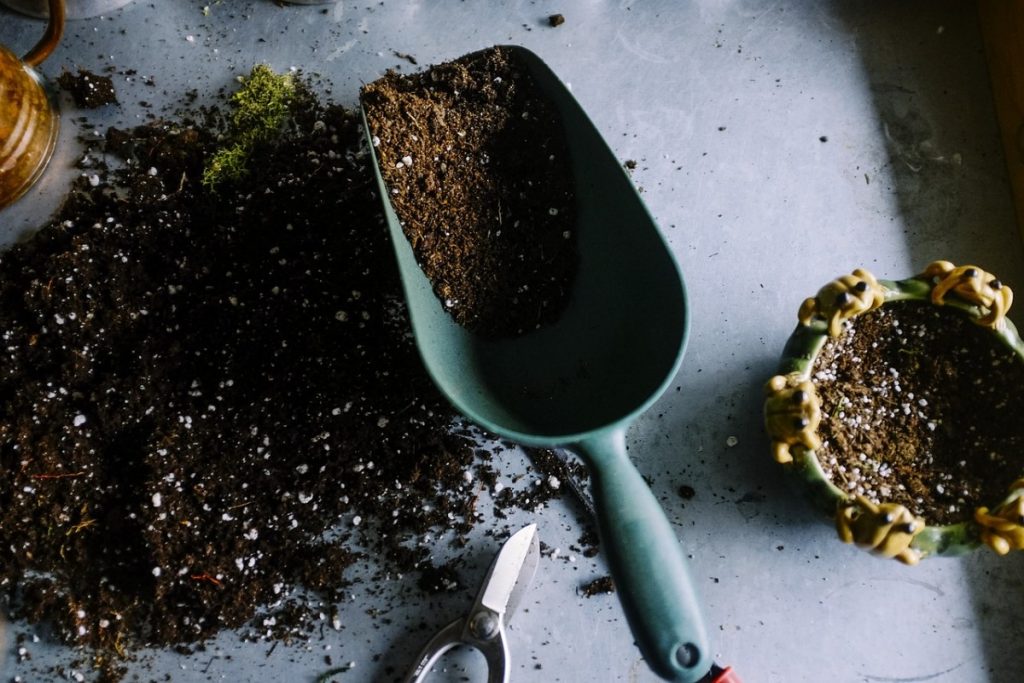
Banana peels and succulents
Most succulents, especially those we grow outdoors, will grow in soil without even fertilizing them in any way. They can survive in a place lacking nutrients. But they will reap benefits if you fertilize the soil, and such succulents do flower more often than succulents that live in a rigid land. And who would not want to see their plants flowering, at least once in a few years? The questions is though whether we can use banana peels as a fertilizer. And a quick answer is yes, you can use peels from the bananas you eat to fertilize your succulent plants. Banana peels contain essential minerals that will help both succulents and other plants to thrive and flower. Let me explain it in more detail.Benefits of banana peels as a fertilizer
Everyone knows bananas are rich in potassium, which is an important mineral for a healthy diet. It works the same way with human beings and plants. As a matter of fact, banana peels not just contain high amounts of potassium and phosphorus. It is also a decent source of additional nutrients such as calcium, manganese, sodium, and sulfur. Potassium in banana peels reinforces stems and shield plants from diseases and helps them in the production of flowers. Another common nutrients in banana peels is phosphorus, and it is one of the nutrients plants simply needs to grow. Phosphorus helps in establishing the roots, and it also accelerates the flowering process. For faster and better result, you should add the banana peels should into the soil, since they will break down easily once in the soil (compared to just lying on the top of it). Banana peels do not contain nitrogen, the essential nutrient required for foliage development though. But they contain significant levels of certain micro-nutrients like calcium that improves the breakdown of organic materials in the potting mix that creates other nutrients in the soil. Manganese in banana peels helps in photosynthesis and the arrangement of certain enzymes and pigmentation of the plant. Sodium is associated with the activity of water and ions between cells–again a very important function to keep the plants healthy. The banana peels likewise contain magnesium and sulfur, both significant in the development of chlorophyll.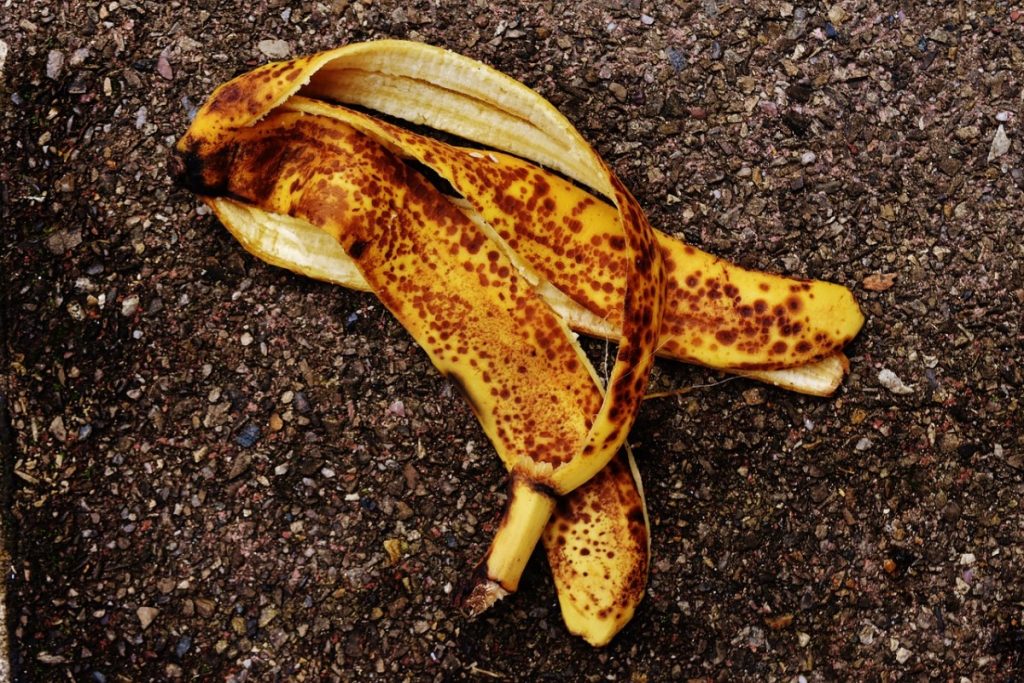
Quick dissolution is one of the main advantages of fertilizing with banana peels
One of the advantages of fertilizing with banana peels is that they break down rapidly in the soil, which means that those nutrients are accessible to plants sooner than the nutrients from other organic materials you may consider introducing as a fertilizer. In creating recipe for a healthy succulent, you need a good combination of potting mix and fertilizers. Cactus and succulents have a recommended amount of soil mix ratio that will promote better drainage and will loosen the density of the soil. Creating a potting mix, you should prioritize the soil rather than the fertilizer since succulents can get enough nutrients from the soil alone. Fertilizing succulents will be just an option if you want your plants to receive extra nutrients. Since we are talking about putting banana peels in potting mix for succulents, there are several ways to use it as fertilizers:- First, you can just lay it on top of the soil but take it off after a couple of days before it starts rotting.
- Second, you can mix it together with the soil in the pot and just let the nature do its work.
- Third, you can put the peels into your compost for a better overall result
Recommended fertilizer for succulents–when you do not use banana peels
Before anything else, it should be organic. An organic fertilizer with a good quality will last longer, and nourish the plants for a long period of time. Another requirement is that it should be low in NPK which stands for (N) nitrogen that promotes more growth, (P) phosphorus that promotes better flowering, (K) potassium that will promote better disease resistance. Commercial brand fertilizers are frequently marked with numbers 10-10-10. Each number signifies the level of the ingredient. The orders of the numbers represent nitrogen, phosphorous and potassium. These numbers adhere to a national standard. Some commercial brands have an NPK of 2-4-2 which will create better results than 10-10-10 in succulents, since succulents prefer milder fertilizers, considering their native lands and the fact they simply aren’t used to growing in soil with high nutrient content.Can succulents grow only in rocks?
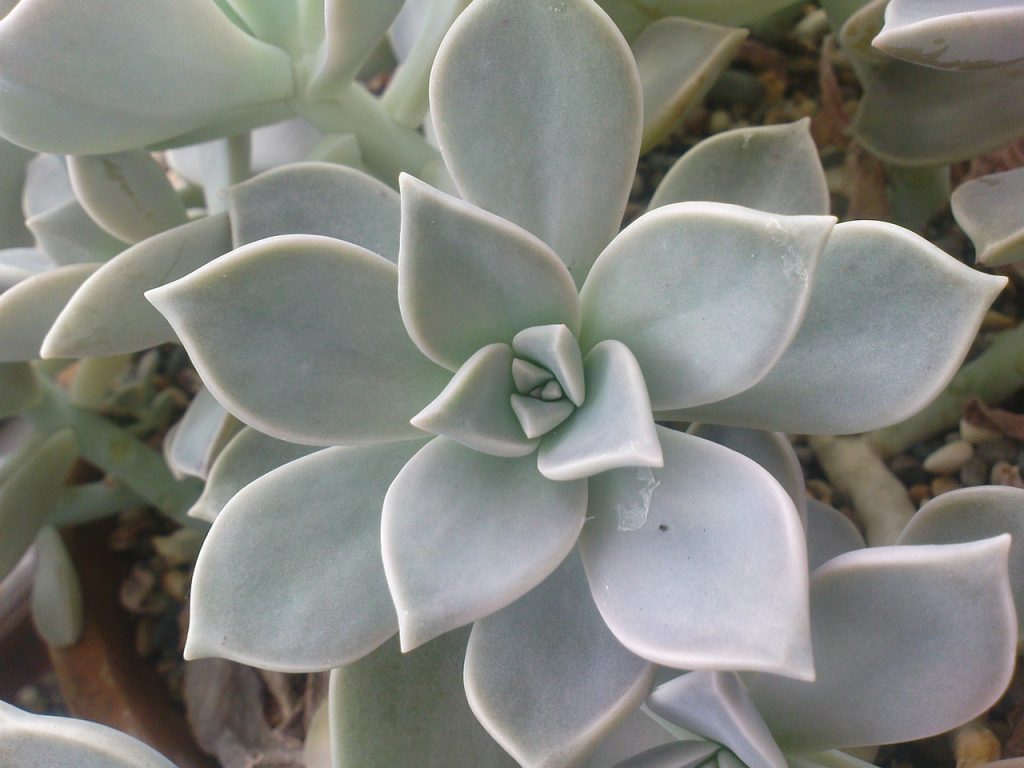
The very reason why people (including myself) ask this question is that they see many commercially sold succulents planted in sand or pebbles. It creates an assumption that succulents can grow in just rocks or sand, with no real soil inside. Is it truth though? Well, the quick answer is, yes. But they can do it only in a short run. Succulents need nutrients that are present in the soil. Without soil, succulents can survive, sometimes for a few weeks or even few months (depending on the succulent variety and the maturity of the plant), but they will eventually die due to lack of nutrients. The gorgeous commercial succulent arrangements we often see in shops are not designed to stay that way for a long time. It is a good short term project but not something you can keep that way back at home for long, unless you want to see running back to the store, having to buy new succulents over and over again.Surviving on sand and in rocks
Succulents are native to semi-desert areas where the temperature is usually high with less moist and water around the plant. Some other varieties though are native to rain forests and mountainous places, and these are the plants that seem to survive on rocks only. What you do not know though are a few things:- There is often some soil in-between the cracks in the rock. You may not see it with your eyes, but the succulent can get nutrients from it.
- Nature environment cannot be compared with the garden. You know, lot of things happen in the nature–rain, animals pooping and marking territory, huge variety of plants around, etc. On a rock on some beautiful mountain the succulent can get nutrients from sources it cannot get in your garden…
So do succulents really need soil to survive for a long time?
The answer is yes. As I already mentioned, most succulents are not epiphytes. They cannot survive without soil. But unlike other plants, succulents need special soil that does not retain too much water. That said, compact soil is not good for these plants. Succulents do not demand soil that’s rich in nutrients. But they demand a fast-draining soil. Commercial succulent and cactus soil mixes are perfect for these plants. Soil like this comes with organic and inorganic materials that provide succulents drainage and nutrients. If you don’t want to buy the commercial soil for succulents, however, you can make your own.Can succulents grow in gravel?
Although some growers suggest that succulents grow in gravel, I don’t recommend planting succulents in pure gravel. Gravel does not provide all nutrients a plant needs to grow healthily. But you can grow succulents in gravel that has a mixture of some organic and inorganic materials. This means that you need to add something to the gravel in order for the succulents to grow and thrive. Let me show you a simple guide on how to do this: Step #1: The first thing you need to do is to fill a 3-5-inch-deep succulent pot with an inch layer of gravel. Some growers recommend using pots without drainage holes. My practice though is always to use a dish or pot with drainage holes. This will keep the plants safe from over-watering. If you use the pot with drainage holes indoor, make sure that the pot has a tray beneath. This will capture the excess water during watering. Step #2: The next step is to pour and evenly distribute some powdered activated charcoal over the gravel layer. The powdered activated charcoal helps neutralize odors that could possibly develop and contained in the layer of the gravel. Step #3: Next, add a peat-based potting soil mix on top of the gravel. You can make your own soil mix. You just need to combine two parts of the peat and one part of the compost. This is a great potting soil for succulents. Step #4: Now, it is time to sprinkle the soil with water. If you are using the pot without drainage holes, it is very important that you don’t give too much water. If you do, the succulents will only rot and eventually die. To determine the level of moisture, you can poke your finger in the soil. If the soil sticks on your finger, it is already wet. The water is enough. Step #5: Now you are ready to plant. Get the baby succulents and plant them in the pot. I love to start with small-sized succulents. It gives me an opportunity to make some amazing arrangements. But whatever you do, do not forget to give space between plants. They need it to breathe. A 2-4-inch spacing can be sufficient for the plants to thrive healthily.Can we prolong the life of succulents that grow in rocks?
Suppose that you are really into trying to grow succulents in rocks. And you wonder how to make your plants survive without soil. Fortunately, you can do a few things to improve your chances of succeeding. It only involves some materials and little extra effort on your part. Add fertilizer as a first step. During watering, mix the fertilizer with the water you are going to sprinkle on your plants. This will give the plants a source of nutrients. Estimate the amount of fertilizer you want to mix. Read the guide on the label, but make sure this is meant for succulents and not for other plants. What you can do is to add some organic materials that will allow the succulents to get nutrients from. Some of the organic materials that succulents love are the Coir (check this material on Amazon) or Coco Fiber and Sphagnum Moss (check this material on Amazon). Having said all of this, if you take care of succulents that grow in wild nature, such as on some nice rocky hill in your neighborhood, you should not interfere with the cycles of nature. Nature is always smarter than we are. If a succulent grows in a certain spot, it is there for a reason, regardless of how unfitting the spot looks to our eye. So just enjoy in its beauty and do not waste time trying to improve something that doesn’t really need any improvement…Potting pebbles and succulents
Succulents don’t like dense soil. Compact soil stores water which in turn causes root rot. Because they are native to semi-desert areas, they love a mixture of sand and soil with a gritty texture. The use of potting pebbles is a good idea to allow the succulents to grow healthily by themselves, without a need to keep your eye on them too often–unless you simply want to savor in their beauty of course. Before we look at the details, let me sum things up: Potting pebbles are helpful for succulents. They provide drainage, root anchor, and aesthetic value. Pebbles do not just help succulents grow healthily. They also help them to look even better in their colorful pots! Let’s discuss each of the benefits, and then we will also look at some brands of pebbles your succulents will enjoy.Drainage always matters
Succulents grow better in fast-draining soil. This means that the soil should provide water exit point. One of the best ways to make a fast-draining soil is mixing the succulent soil with potting pebbles. This way the excess water will easily drain leaving nothing but moisture. Without drainage, the excess water will stay at the bottom of the pot. This is bad for succulents. They are not accustomed to such conditions, since in their native lands (semi-desert areas) they never experience it. As a result, they may develop several growth problems. One of which is darkening or developing dark spots on leaves or stems. Related: Can Succulents Grow in Rocks?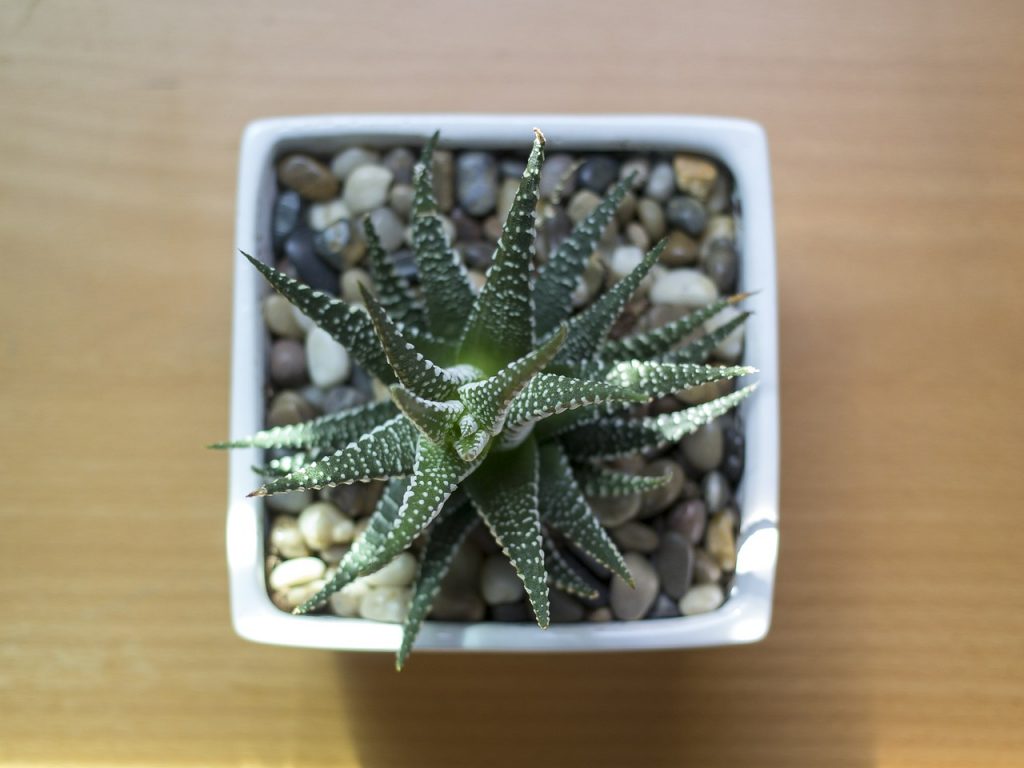
Pebbles provide great anchor for the roots
The second benefit of incorporating potting pebbles into your succulent soil is that potting pebbles provide root anchor. Most plants establish stability with soil. But succulents’ roots are more stable and rigid when roots are anchored on pebbles. Therefore, potting pebbles provides strength to the whole plant. With sufficient pebbles to hold on to, the plants will grow healthily and naturally, and won’t have a tendency to fall over, even if it grows quite big–which is a common problem with some succulents.Aesthetic value shouldn’t be downplayed
On the top of drainage and root anchor, potting pebbles also add to the aesthetic value of the plant. That being said, pots look more beautiful with pebbles than without them. As simple as that. However, putting potting pebbles along with the succulents requires understanding color harmony. This means that you should make sure that the color of the pebbles will match well with the color of the plant. Another thing to remember when putting pebbles in the pot is the size and shape. Depending on the type of succulents you are growing, size matters to maximize the aesthetic effect.How to prepare potting pebbles for succulents?
Before putting the pebbles into the pot, make sure that you thoroughly clean them. My usual practice is that I soak pebbles in the water for a couple of hours. This will soften the soil and kill the elements that may get into the pot with the pebbles. This is very important especially if you reuse the pebbles from the other pot, perhaps one from a succulent that has died as a result of some fungal infection. For easy cleaning, you can mix the water with fragrant liquid soap. Wash them thoroughly. Make sure that the pebbles are totally cleaned by rinsing them with clean water. After the pebbles are cleaned, it is time to place them in the pot. The first thing to do is to pour the pebbles first into the pot making a layer about an inch thick. This enhances the drainage system of the soil mix you are using for your succulents. If you are using a pot with drainage holes, it is important to consider the size of the pebbles. For smaller ones, you might need a mesh over the hole to hold the pebbles and prevent them from slipping through. Then fill the rest of the pot with the fast-draining soil mix. Plant the succulents in the soil. Then make another layer of pebbles around the succulents. The pot should look amazing after spreading pebbles at the top of it.Best potting pebbles for succulents
If you are serious in making your succulent garden even more colorful and vibrant, you need potting pebbles that are colorful and have perfect shape and size. For my garden, I use potting pebbles that I bought online and I would like to share with you my trusted brands, just to help you make a good selection. Let’s start.Ellie Arts
This brand offers stunning potting pebbles for succulents. The stones come in different natural shades such as white, red, grey, and brown. The pebbles are perfect for succulents on any given occasion. The color of the stones is just amazing, as I can see in my own garden. It makes my plants even more eye-catchy as they already are. Click here to check customers’ reviews and current price on Amazon (* this is an affiliate link, if you make a purchase I may earn a small commission at no extra cost to you).Natural decorative polished mixed pebbles
These decorative pebble stones have multiple uses perfect for flower arrangements, succulent containers, and other small applications. What I like the most about these pebbles is that they come in multiple natural shapes and colors. There is no toxic chemical added so the stones are safe for the plant and environment–which is more important than ever in the world we live in. What I like the most about these pebbles is the way they are polished. The stones are clean, dust-free and shiny. Safe for kids too. Click here to check them on Amazon.Small River Pebbles
This brand of potting pebbles produces safe and non-toxic stones for succulents and other potted plants. It is all-natural and free from any toxic chemicals. The stones were thoroughly rinsed so you don’t have to worry about safety, and can place them in the pot without cleaning them at home again. The pebbles are not only perfect for succulents but also for other types of ornamental plants. The colors of the stones are also perfect for indoor and outdoor gardens. The stones have vibrant colors that add aesthetic value to the plants. Click here to check them on Amazon.Mexican Beach Pebbles
The Mexican Beach Pebbles are natural stones from Baja California. Due to their perfect color and size, these potting pebbles are commonly used by professionals for their landscaping projects. The vibrant colors make landscaping and gardening even more exciting. Not only that, these pebbles keep moisture in the soil while draining the excess water. As a result, your succulents will always be safe from over-watering. Click here to check them on Amazon. So, that’s my selection, I hope you found at least one favorite there, and I wish you happy growing and a lot of fun with your new pebbles :).Final thoughts
Potting pebbles offer several benefits to the succulents. They help the succulents grow healthier and more beautiful. The color and size of the pebbles add to the amazing characteristics of the succulents. However, growing succulents require a lot of trial and error. Not everything you read online really works on your personal journey. So take time to indulge in the process of growing succulents and be patient. If you are determined, you will ultimately succeed. Good luck!Are clay pots good for succulents?
When deciding about the right pot for your plants, you likely have many questions on your mind. Is clay the right material? Is there any specific pot size for the succulent? Do I need to remember something important when having succulents in pots from clay? In this article, I am going to answer all these questions, and help you with your beautiful succulent garden.Each planter has some advantages and disadvantages
I learned that a perfect pot does not exist. Each pot and each material has some advantages and disadvantages. Choosing the right pot for your succulent, you have to consider the material, the size of the roots, the weather, and also the specific need of the succulent. But I do not want to over-complicate things. In every garden, you can find clay pots. From all materials used for potting plants, pottery is the first ever created by humans. It comes with different sizes and variations. It also has a variety of uses. It fits as a decoration inside the house or office tables. Clay pots are good for succulents. Relative light weight, structure, appearance, durability, insulation, water absorption and natural drainage are all favorable for the succulents. Compare to the plastic pots, clay pots are heavier, it may seem bad but it is good for the sake of the succulents. Because succulents tend to be heavy on top and I saw it many times that a plastic pot could not hold the plant and it fell over. Aside from the plants itself, seedling on clay pots also helps to avoid it to tip over by strong winds–now with global warming so common in many places of the world.Clay pots are fragile–their biggest minus
Show me one gardener who has never broken a clay pot. You know, we carry plants around, or we do some other work in the house or garden and by accident hit the pot. Once a clay pot falls to the ground, it will break. That’s a disadvantage when we compare it to plastic or wooden pots. It is something you should consider when deciding whether or not to opt for clay. In terms of insulation, clay pots are better than plastic or metal pots. Much thicker than the others, it helps in many instances. For example, if the succulents are exposed to extremely high or extremely low temperatures, they have a higher tendency to survive when compared to plants in pots from plastic or metal. Simply because the insulation protects the roots better.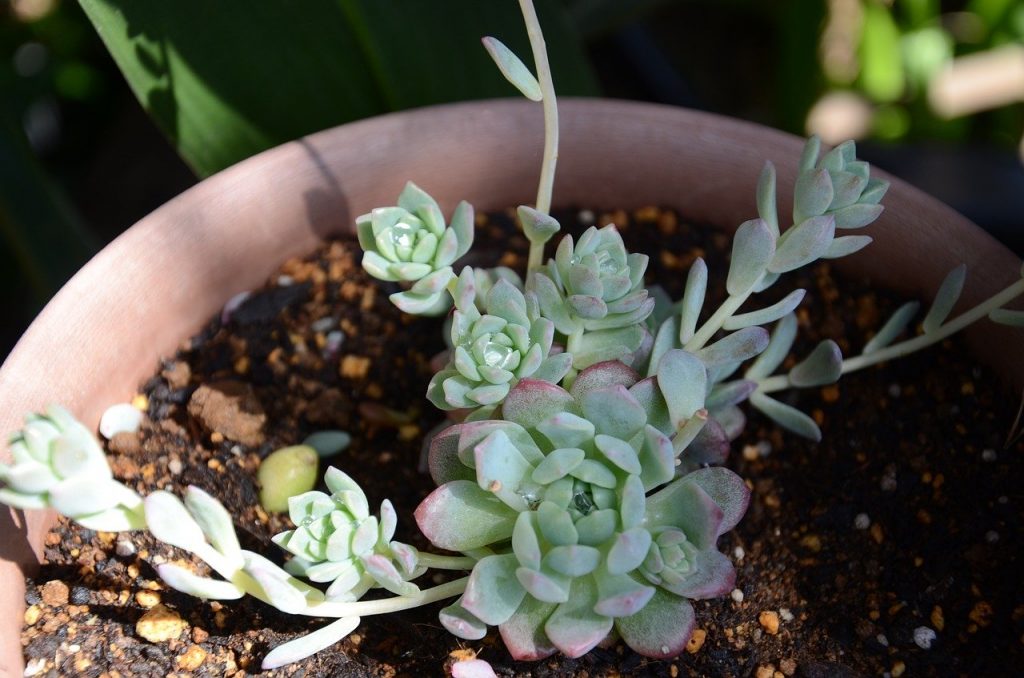
Excellent draining system pf terracotta pots
Terracotta pots drain better and faster, which is something a succulent needs. Through its porous bottom, the roots and soil could easily be dried. If you are a newbie gardener, go with clay pots. They will forgive you some of your early mistakes–such as over-watering your plants, a mistake a plastic pot may not forgive you… The appearance of the clay pots is also an advantage when we compare them to other materials. The color of orange matches the soft tones of the succulent plants. There are ways on how you should take care of your terracotta and clay pots. Before planting a succulent in a clay pot, make sure that you wash it with water thoroughly to remove the substance that may harm the plants. Since they cannot stand any frost, you should empty it during winter and store it in a place like in the basement.Easy to spot a crack in a clay pot
Identifying if a clay pot has a crack is easy. When you tap it with your fingernail and it creates a dull thud, there is certainly a crack, because normally it will create a ringing sound. When it comes to stains on the clay pot, you can remove it with warm water, a detergent, or a brush. Another important thing to consider is the size of the pot. If you choose a huge pot it might rot the root of the succulent because the soil will not dry out easily. One the other hand in a small pot you will often have to change it after a year or so. This is because when the succulent grows bigger, the small pot may not be able to hold the plant (and it will fall over). The perfect size of the clay pot actually helps with the appropriate level of moisture in the soil. A succulent should have a five to ten percent bigger size of pot than the size of the actual plant. For example, a rosette type that is usually around three inches should be placed in a clay pot that is around 3.5 to four inches in diameter.My favorite terracotta pot & more
There are many types of Terracotta clay pots. The first one is the traditional terracotta pot (click here to see it on Amazon). You could choose a variety of sizes to have an adorable look and adding some design by painting them. Aside from the traditional clay pots, you will find also cylindrical clay pots. This type of a pot adds a modern touch to your garden while maintaining a classic look. The third one is a squared shaped terracotta. This one boosts the appearance of the succulents. Another pot is the strawberry terracotta pot. If you love an old charm vibe of terracotta and still love to mix and match pots, this is the best choice for you. It has an extra hole that is ideal for some succulent like sedum, echeveria, and the string of pearls. The fifth variation of a clay pot is the embellished terracotta succulent pot. It has a design of flowers and patterns that are aesthetically wonderful.Final thoughts
Choosing the right pot for succulents depends on many factors. But for me, based on my experience, clay pots are good for succulents. But of course, it may or may not work for all of your plants. The climate and internal design of the environment where the succulents will be placed may affect the choice. It is your job as a succulent grower to figure out what is best for your plants while considering the aesthetic value it delivers.Glass containers and succulents
Most often than not, when you buy succulents you get them in a nursery pot. In 99% of cases the pot is made of plastic, simply because it is the cheapest material and sellers have no motivation to spend any extra money on the pot. Almost always you will want to transfer your new plants to nicer and bigger pot, fitting for their size and beauty. When transferring any kind of plant to a new container, it is a general rule to use a pot that has a drainage hole to prevent your plant from drowning. So the question is, how transfer or plant succulents in a glass container, which typically has no drainage hole? First of all, be mindful of the soil that you will use when you transfer your succulent to a glass container. Choose a high-end potting soil that will help you take care of your succulent with infrequent watering schedule. You can use glass bowls and jars that are fit for plants and have drainage holes in them. Anyway, let’s have a look at 6 steps of planting succulents in glass jars and pots.FIRST STEP: Make sure you have everything ready
Prepare your materials beforehand to avoid distractions later on, so you can work continuously. Imagine that you are a warrior getting ready for a battle :). Here’s the “arms” you will need:- Succulent/s of your choice
- Glass pot, bowl or jar (with or without drainage hole)
- Potting soil of your choice
- Gardening trowel
- Mesh tape
- Water
- Moss
- Pebbles or any decorative materials
- Fertilizer
SECOND STEP: Remove your succulent from its nursery pot
A typical soil in nursery pots retains too much water, which is unhealthy for the plants So it is best to remove the nursery soil completely when you transfer the succulent to a new container. Gently remove the dead leaves, as well, to make your succulent look healthier and to prevent any further damage. Remember to handle your succulent very gently and with care.
THIRD STEP: Apply mesh tape on the drainage hole of your glass pot/bowl
This step is only applicable if your glass container has a drainage hole. You use the mesh tape to prevent soil from falling down, and at the same time to keep the water running and prevent drowning of your succulents, or root rot. If you’ve never heard of a mesh tape, let me clarify it for you. A mesh tape is any tape that has very small holes in it–small enough so the soil particles won’t fall over, but at the same time big enough for the molecules of water to get through…FOURTH STEP: Fill your glass container of choice with soil
Fill your pot with the soil of your choice; it may be a regular soil if you are using a glass container with drainage hole underneath, or a high-quality soil if you are using a glass container without any holes to let the water out. High-quality soils keep your succulent healthy without much need for water, as well. You can check my guide on preparing perfect succulent soil for more information. Some succulent enthusiasts claim that organic potting soils are much healthier and usually suit the succulents better. A homemade potting soil, however, isn’t hard to make. You can use half of the regular potting soil, a quarter of perlite and another quarter of sand. Or check my guide more more in-detail instructions. Make sure to fill the glass jar only halfway first so you have enough space to put on your succulent/s and add more soil or decorative rocks later on.FIFTH STEP: Put your succulent(s) in place
Choose the style of your arrangement. If you are transferring a single succulent to a glass jar, you can place it in the middle, at the sides or anywhere around the container that you feel it would look nice and comfortable. However, if you are transferring more than two plants, you can experiment and style them in any way you like! You can compile them in a single place or corner or spread them out to your liking. You could also use different types (in terms of structure and height) of succulents to freely experiment in assembling them around your container. The only thing is to make sure that your succulents have enough space to breathe and grow. Also do not forget to remove dead leaves before putting your succulent in place.SIXTH STEP: Add another layer of soil and/or decorative materials
Once you put your succulent(s) in place, you can now add another layer of potting soil and fill it to the top (or however you want it to be), finishing things up with a top dressing of pebbles, small rocks, or whatever you like. Two things to remember with this step:- Lightly bury the roots into the soil. Give it just enough support so it won’t bend or something similar.
- Make sure to keep the leaves of your succulent on top of the soil, instead of burying them beneath. It will help you prevent the rotting of your succulent.
